Here’s what to do before, during and after leading a video call in Microsoft Teams to ensure a beneficial experience for all.
You may spend most of your time in Microsoft Teams collaborating with your co-workers via text chats, but with office workers around the world now working from home, conducting video meetings in Teams has taken on increasing importance. While Skype for Business still exists as a separate product for legacy customers, Microsoft has folded its functionality into Teams, which is included with Microsoft 365/Office 365 business and enterprise subscriptions.
It’s easy to start a video meeting in Teams, but there are ways to enhance the experience for you and the other participants, whether it’s an informal video chat with co-workers or a client presentation. Here’s how you can get the most out of Teams for video meetings — best practices for before, during and after your meeting.
Note: This story is primarily for business users whose organizations have a Microsoft 365 Business Essentials or Business Premium subscription or an enterprise-level Office 365 E1, E3 or E5 subscription. Although Microsoft offers a free version of Teams, it doesn’t include many of the features covered in this story, such as the ability to schedule or record meetings.
Before the meeting
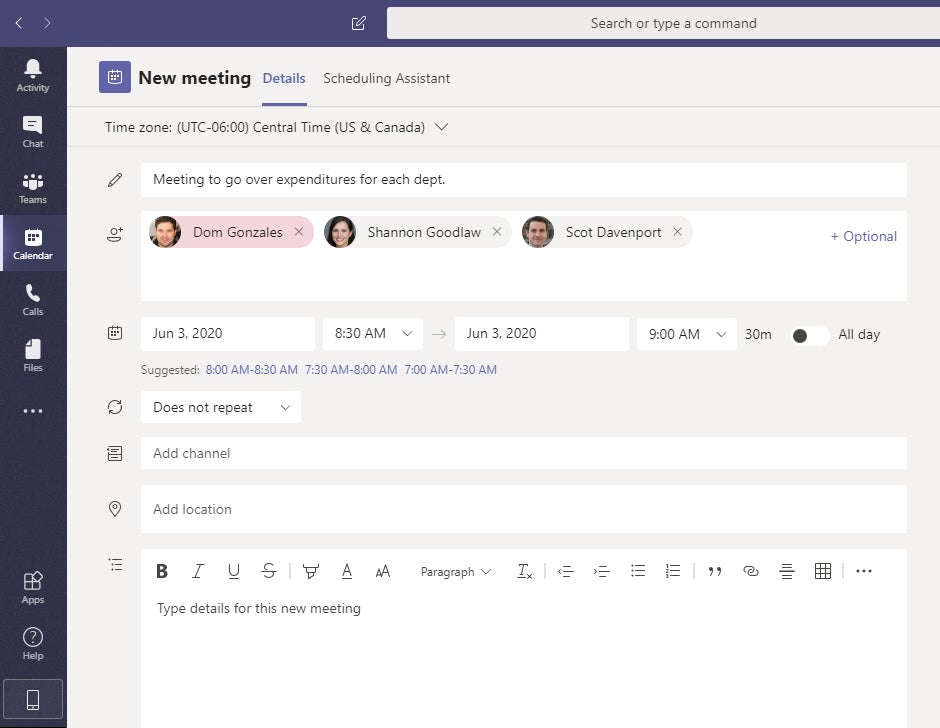
To set up a video meeting in Teams, click the Calendar icon in the left toolbar. This brings up a calendar in the main window of your Teams workspace.
At the upper right, click the New meeting button. The “New meeting” screen will open over the main window. Type in a title for the meeting and then add the attendees’ email addresses — or, if your corporate address book is integrated with Teams, you can just start typing their names and select from the list that appears. If you want to invite people without requiring them to attend, click the Optional link at the right end of the attendees field and add them in the “Optional” field that appears.
IDG
On the next line, choose a date, a start time and an end time. That’s all that’s really required to set up a meeting, although there are ways to enhance your invitation, which we’ll cover below. When you’re done setting up the meeting, click the Save button at the upper right, and the invitation will be sent.
1. Fine-tune your meeting time
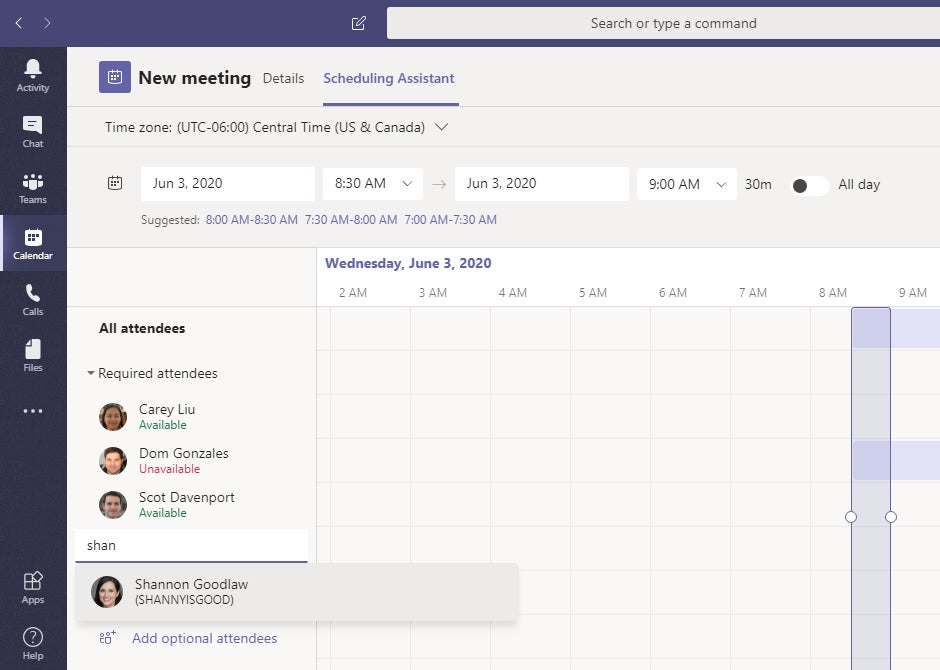
One way to find out if the time you’ve picked for a meeting works for all attendees is to just schedule it and see if anyone objects. There’s a better way: At the top of the “New meeting” page, click the Scheduling Assistant tab. Down the left side of the page that appears you’ll see a list of all the required and optional attendees you’ve invited, with a status below each person’s name: Available, Unavailable or Unknown. This information is based on events that invitees already have scheduled in their Outlook calendar. To the right is a schedule view showing each person’s already-scheduled meetings shaded in purple.
IDG
If at least one of your invitees is unavailable on a meeting day you’ve selected, Teams will automatically determine alternate times, if any are available. Find the start and end times that you set for your meeting toward the top of the screen; just below that you’ll see suggested times for the meeting. Click one of these suggested times, which will replace the start and end times that you originally typed in.
Alternatively, you can scroll through days in the schedule view to see if another day has fewer conflicts than the one you initially chose. If you find a day and time that work for everyone, click the date and the start/end times near the top of the screen to change them.
2. Share your meeting’s agenda
As you’re scheduling your meeting, it’s helpful to add your meeting agenda so everyone knows what will be discussed in the meeting and can prepare appropriately.
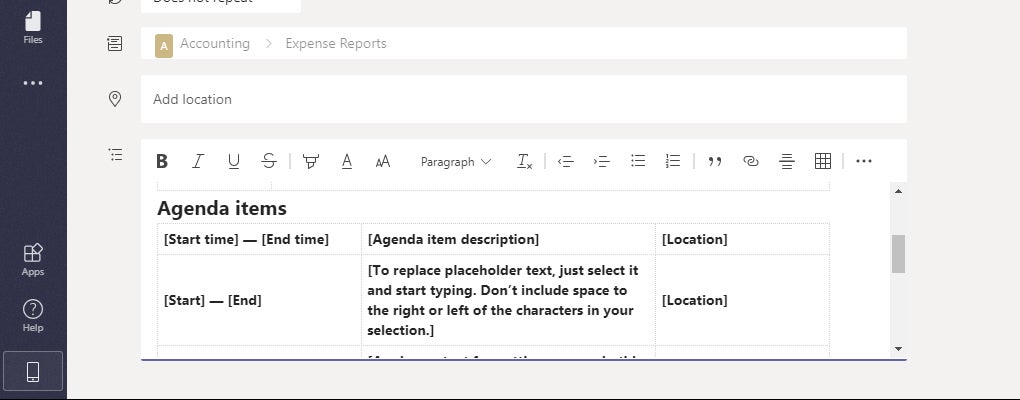
At the bottom of the “New meeting” screen is a composition box where you can add a message to include in the meeting invite. This is a good place to put a brief meeting agenda (especially in an easy-to-read format like a table or a bulleted list), but we suggest that you don’t make it too long, because it can overwhelm the meeting details in the invitation email.
IDG
If you need to provide a more detailed agenda, it’s best to send a separate email with a .doc or PDF file attached — or, if you’re hosting the meeting in a channel, you can post a reply to the meeting announcement message with the agenda attached, as described below.
3. Host your meeting in a channel
In most cases you’ll probably want to invite specific people to your meetings, but you can alternatively set up an “open” meeting that’s hosted in a particular channel in Teams. When you do that, any members of that channel can attend the meeting. This can be handy if, say, you have created a channel for a specific project and you want anybody working on the project to be able to attend the meeting.
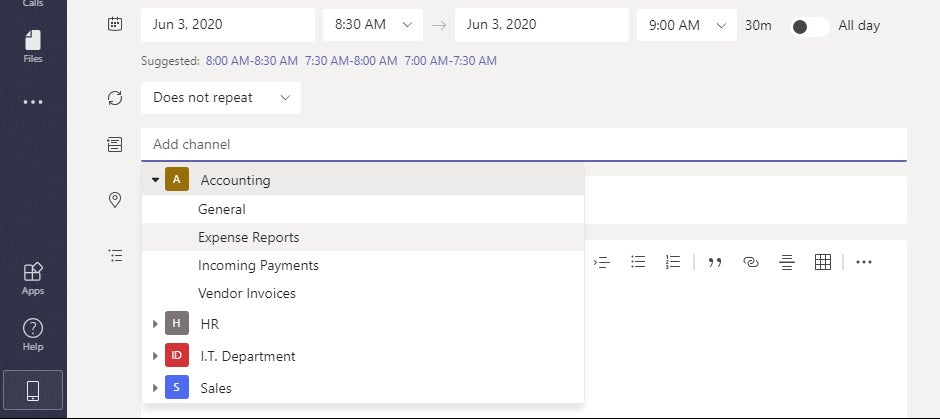
When you’re setting up your meeting, click in the Add channel box in the middle of the “New meeting” screen, and from the drop-down menu that appears, select a team and a channel.
IDG
Once you finish scheduling your meeting and click the Send button, it’s announced as a message under the channel’s Posts tab, and each member of the channel receives an email invite. Any member of the channel can post a reply to the announcement, adding files or other relevant information in their reply.
IDG
By posting a reply to your own meeting announcement, you can attach a meeting agenda as a document (such as a .doc or PDF file). This is a good way to give your invitees and channel members a breakdown of what will be discussed in your meeting.
4. Test your hardware
Before you lead your first Teams video meeting, create a test call where you can set up your device to work with Teams. You might need to grant Teams permission to access your computer’s microphone, speakers and camera, sometimes in more than one place; recent versions of macOS, for instance, require you to take the extra step of granting permissions in System Preferences.
Do you plan to share your screen in the meeting? That, too, may require a separate permission. Test it out and get it all squared away now.
Likewise, if any of your invitees are new to video calling with Teams, request that they arrive 10 minutes early. You can start the meeting early and give them a chance to get their hardware working properly before the meeting is scheduled to begin.
During the meeting
5. Use background blur or a background image
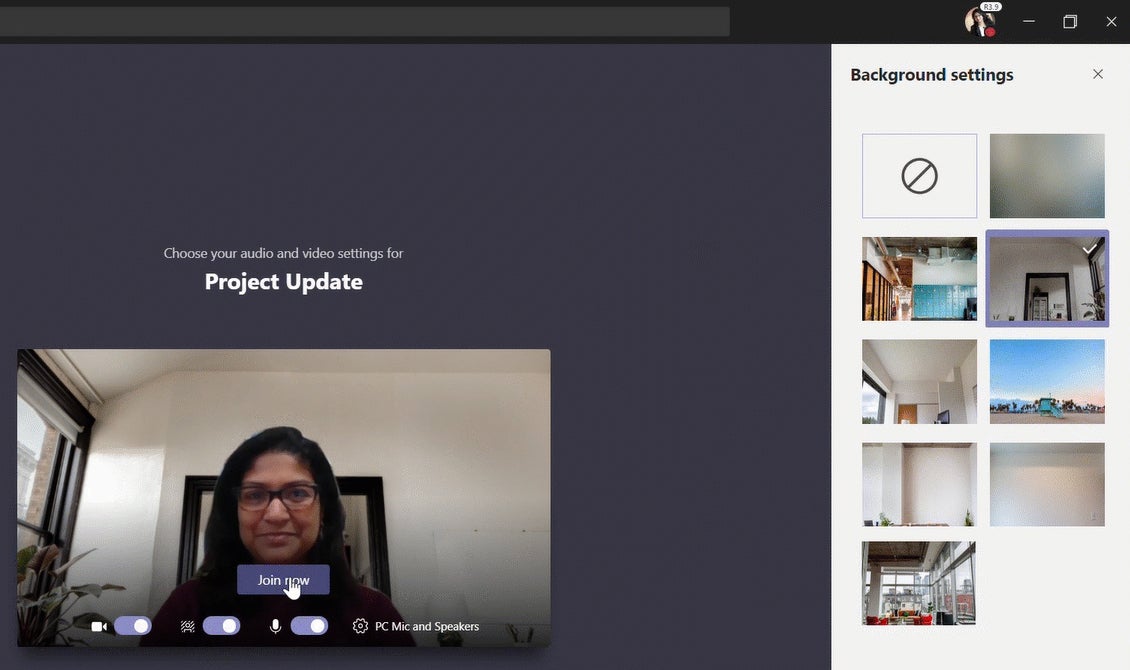
In a video meeting, a professional appearance is important — and that includes what appears behind you on camera. Microsoft’s background blur feature does just what it says: blurs the background behind you. Alternatively, Microsoft provides a set of background images you can choose from to appear behind you. Using background blur or a background image helps make your image stand out, and other attendees won’t be distracted by whatever is behind you in the room.
To turn on background blur or a background image before you join a scheduled meeting: Along the bottom of the video preview that shows you on camera, click the second switch (the headshot icon). A “Background settings” pane appears on the right. Choose the blurred image in the upper right to turn on background blur, or choose one of the other background images to appear in front of that image. (Microsoft says that at some point it will allow you to upload your own custom background image, but that feature isn’t available yet.)
Microsoft
To turn on a background effect when you’re already in a meeting: Move the cursor to summon the meeting controls toolbar over your video feed. Click the three-dot icon to open the “More actions” menu, then select Show background effects. You’ll see the “Background settings” pane as described above. When you make a selection in the pane, you can click Preview first to see what you’ll look like (this turns off your video in the meeting), then click Apply and turn on video to have it appear to others.
Note that some models of front-facing cameras in laptops or other devices, or certain webcam models, may not be supported by Teams for background effects. Also note that background effects are only available for scheduled meetings, not on-the-fly ones.
6. Screen-share, don’t overshare
If you need to share information that’s displayed in an application running on your PC (for example, a spreadsheet open in Excel), you can share just that application and not the rest of your desktop. This focuses your attendees’ attention on only what you want to show them in the application. And it protects your privacy, as they won’t see other information that may happen to be on your desktop, such as an opened calendar or email application.
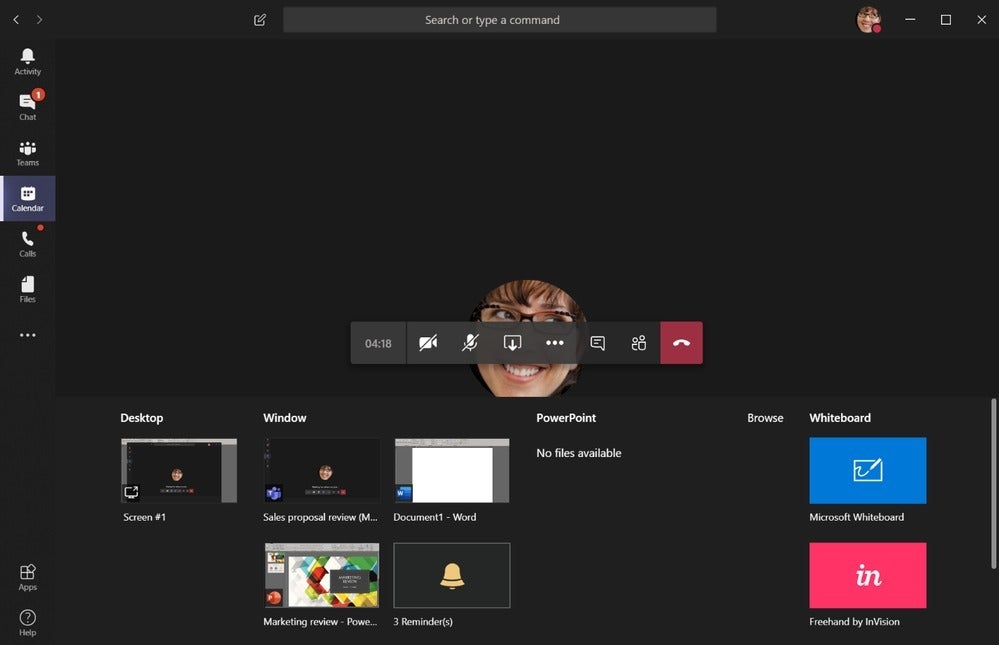
To share an application window that’s running on your PC, move the cursor to summon the meeting controls toolbar and click the Share icon (the arrow over a rectangle). A panel will appear along the bottom. Thumbnails of applications that are running on your PC are under the “Window” category. Click on the app window that you want to share with others in your meeting.
Microsoft
Also note the other options available in this Share pane. In addition to sharing a specific app window, you can share a PowerPoint presentation; browse Teams, OneDrive or your computer to share a file; or open an interactive whiteboard that you and the other meeting participants can mark up.
7. Take advantage of live captions
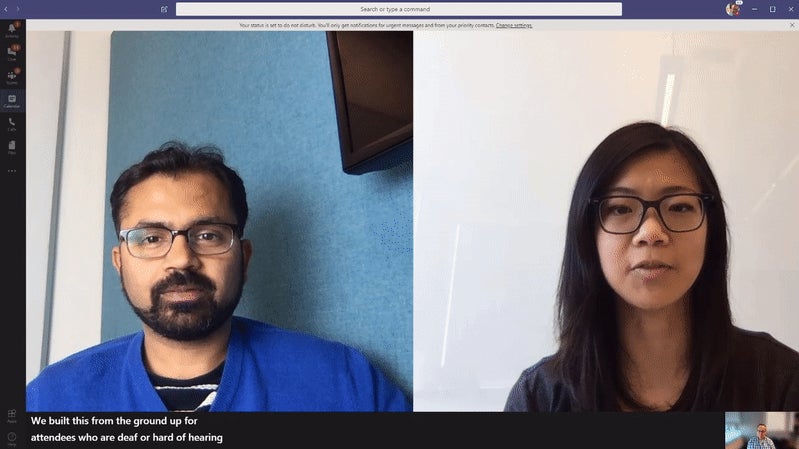
If anybody in your meeting is hard of hearing, isn’t a native English speaker, or is having trouble hearing the audio for another reason, Teams’ built-in closed captioning feature can help them follow the conversation better. It automatically converts speech into captions that appear below the video feed in real time.
Microsoft
Each participant using a Teams desktop or mobile app can turn on live captions for themselves, but it’s not available in the web interface. To turn on live captions, move the cursor to summon the meeting controls toolbar, click the three-dot icon to open the “More actions” menu, and select Turn on live captions.
Be aware that the live captions feature is currently being tested as a preview and works only if you’re speaking English. That said, a group of Computerworld editors tested the feature recently and were highly impressed by its accuracy.
8. Record your meeting
It’s easy to miss important points during a meeting, but you can easily record your meeting. The video file will be saved to Microsoft’s Stream service in the cloud, and you and other team members will be able to watch it. This is useful for those who missed your meeting or for anyone who needs to go back over what was discussed in the meeting.
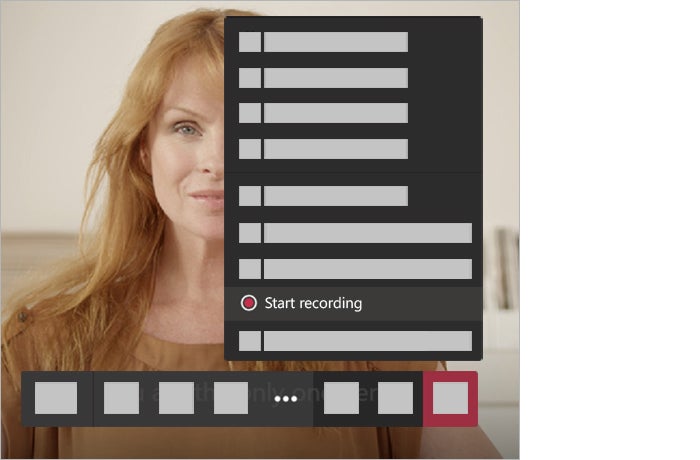
To record your meeting, move the cursor to summon the meeting controls toolbar, click the three-dot icon to open the “More actions” menu, and select Start recording from it. The other meeting participants will see a banner notifying them that they’re being recorded.
Microsoft
You can stop recording at any time by clicking the three-dot icon and selecting Stop recording. The recording will be processed and saved to Stream (which may take some time), and after that you and others who were invited to the meeting will be able to watch the video. (We’ll cover that below.)
9. Take meeting notes
It’s not uncommon in meetings for important points to be raised or action items to be decided on — and then promptly forgotten once the meeting’s over. To help keep track of these items, you or another attendee can take notes that will be saved as part of the meeting in Teams. Because they’re saved along with the meeting itself, they’re easily accessible for review later.
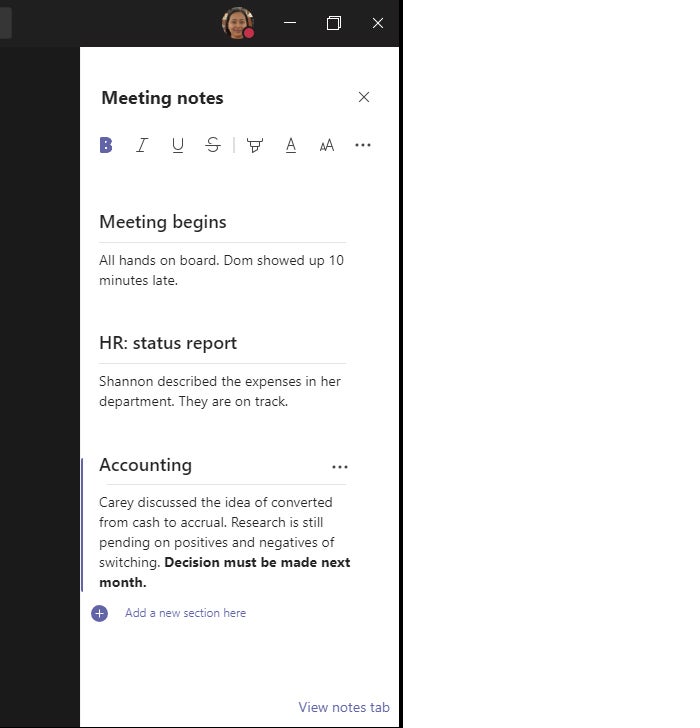
To get started, move the cursor to summon the meeting controls toolbar, click the three-dot icon to open the “More actions” menu, and select Show meeting notes. The “Meeting notes” pane appears along the right side of the Teams window. Click the Take notes button and begin typing in notes.
Once you do so, a formatting toolbar appears that lets you apply bold, italic, highlighting, numbered and bulleted lists, and other formatting to your text. Click the + icon to add a section headline. You can create as many sections as you need to keep the notes organized. If you want to rearrange the sections, click the three-dot icon to the right of any section and select Move up or Move down.
IDG
After the meeting
10. Share the recording
If you’ve recorded the meeting, the recording (once it’s had a chance to be processed and saved) will be accessible to you and the other meeting invitees via the meeting’s chat page in Teams. It doesn’t hurt to remind your team members that the recording is there and ready to be viewed at any time.
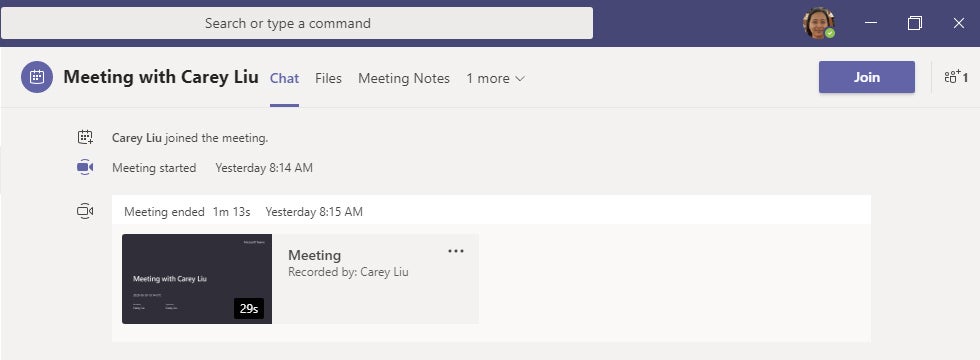
You or any of the other attendees can get to it by clicking the Chat icon in the left toolbar. In the Chat pane just to the right of the toolbar, select the meeting during which you recorded the video. There will be a thumbnail of the recording posted on the Chat tab for the meeting. Click the thumbnail to play the video.
IDG
Alternatively, you can click Calendar in the left toolbar, find your meeting, click it to open it, and click the Chat tab at the top of the window. The chat tab opens, and you’ll see the recording thumbnail on the page. The video is also accessible to all participants via Microsoft Stream, and if you hosted the meeting in a channel, you’ll find the video posted as a reply to your meeting announcement in the Posts tab.
Only the person who recorded the meeting can share it with people who weren’t invited to the meeting. There are a few different ways to do it: If you want to share the video with your entire organization, click the three-dot icon next to the video’s thumbnail on the Chat tab page, and from the menu that appears, select Share, then click the Share button.
If you want to share it with select people, click the three-dot icon next to the video’s thumbnail and select Get link, then click the Copy button. You can paste the link into an email and send it to specific recipients. Or you can click the three-dot icon next to the video’s thumbnail and select Open in Microsoft Stream. The meeting recording will open in Stream, and you can click the Share button to get a sharing link, email it to specific people, or get code for embedding the video in a web page.
11. Review and share the meeting notes
If you’ve taken meeting notes, those are attached to the meeting in Teams as well. You or the other attendees can access them by clicking Chat in the left toolbar, selecting your meeting and clicking the Meeting Notes tab. Alternatively, you can click Calendar in the left toolbar, select your meeting, click the Chat tab, find the meeting notes announcement, and click Show notes in fullscreen. And, you guessed, it, if you hosted the meeting in a channel, the meeting notes will appear on the Posts tab as a reply to the original post about the meeting.
If you or another attendee took notes using a different tool, such as Microsoft Word, you can add them in a follow-up message to the meeting itself or the post about it in the channel.
Making sure your team can review both the meeting recording and the meeting notes will help clarify what was discussed and ensure that action items aren’t forgotten.


