Getting the dreaded Windows 10 black screen, with or without a cursor? Here are some simple (and not so simple) ways to banish it and get your desktop back.
The “black screen” phenomenon in Windows 10 shows poignantly how nothing sometimes matters quite a lot. Seeing nothing except black screen where the desktop and its applications normally appear is disconcerting for users, because they literally can’t see what the PC is — or isn’t — doing.
When experienced Windows users encounter a black screen, they know at least two things immediately. First, they know that something is wrong with their PC. And second, because nothing (or nothing much) is visible, they can surmise that the graphics subsystem is likely involved, based on the absence of information on display.
That’s a good start, but what users really want is to get their desktops back. In this story I’ll guide you through the different types of black screen in Windows 10 and the surest methods I’ve found to fix them.
Two kinds of black screen, with one subtle difference
Windows 10 cognoscenti recognize two different types of black screen in the Windows 10 world. The first is a black screen, plain and simple. This means the screen is completely dark with nothing at all showing. Zip, zero, nada.
The second is what’s called a “black screen with cursor.” Just as it sounds, this means that the display is completely black, except that the mouse cursor is shown on that black background. Often, the cursor will track mouse movement even though it’s mousing over a completely black screen. The image at the top of the story shows what this looks like.
In my personal experience, the black screen with cursor occurs far more frequently than a black screen by itself (no cursor). I’ve found that two causes are the most likely culprits when a black screen with cursor appears. First is a failure of the graphics subsystem to interact with the display upon waking from sleep. Second is a problem with the graphics driver, the special software that interacts with the display on behalf of the graphics subsystem inside the OS to render pixels on the screen, itself.
The presence of a cursor that responds to mouse movement — as it often will — is actually a good sign. It indicates that the OS is still working (at least to some extent) behind the scenes, and that the mouse driver can still track cursor position onscreen. This means that there’s a very good chance that the desktop can be restored to normal operation using a few well-known key combinations.
Two keyboard combos can (usually) restore normal operations
Both combinations involve pressing multiple keys simultaneously. This usually means using one finger to depress the first key and holding it down, using a second finger to depress the second key and doing likewise, then more of the same for a third key — and one of these two combinations requires adding a fourth and final key as well.
Combo 1: Restart the graphics driver
This four-key combination tells Windows 10 to stop, then restart any and all graphics drivers that happen to be running. Most Windows 10 systems use only a single graphics driver, but those with multiple graphics cards (or card plus chipset) and multiple displays may have multiple drivers running.
This keyboard combo reads: Windows key + Ctrl + Shift + B. I usually do the first three keys with my left hand, then press the B key with my right forefinger while the others remain depressed.
If you see immediate disk activity (from a disk activity indicator), that’s a good sign. Sometimes the screen will return to normal operation a few seconds later, showing that the driver has reloaded and is now running successfully. Sometimes, nothing else will happen after the disk activity light ceases flashing. Then it’s time to try the second sequence.
Combo 2: The three-fingered salute
This is a familiar key combo to longtime Windows (and even DOS) users. It reads: Ctrl + Alt + Delete.
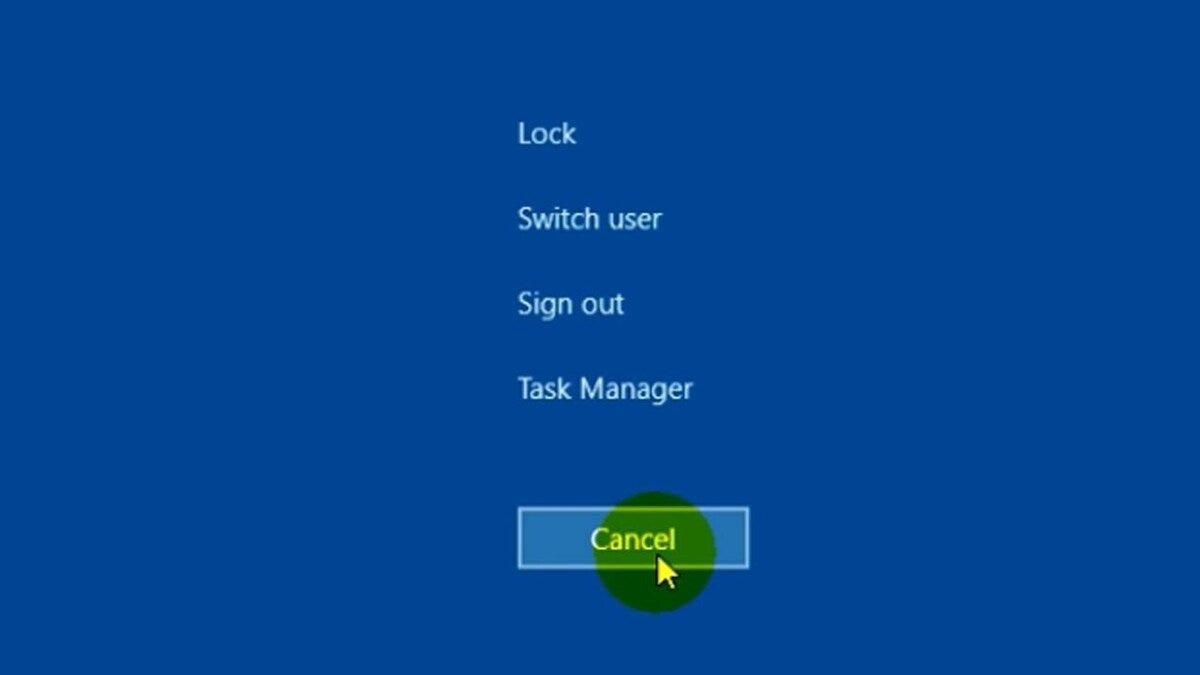
It’s notorious to those who’ve been using Microsoft OSes for a long time (since the mid-‘90s or earlier), because it used to forcibly reboot the OS when struck. Starting with Windows 95 (and Windows NT version 3.5), this key combination now invokes the secure sign-in screen shown in the figure below.
 Ed Tittel/IDG
Even when the preceding combo gets the graphics driver going, it sometimes still won’t light up the screen. And sometimes when that’s the case, this key sequence will repaint the screen to show you the secure log-in options. What this screen capture doesn’t show is the power buttons at the lower right, with networking, ease of access and power controls (shut down, restart, and so forth) from left to right. If this screen does appear, click “Cancel” (as shown) and your desktop should reappear in working order.
What if the screen remains black?
If the cursor is absent, these key combos often won’t help — and sometimes they don’t help even when the cursor is present. In such cases, there’s really only one thing to do next: forcibly power off the affected PC. For most devices, this means holding down the power button until the PC shuts down.
A minority of devices may have the power button action redefined so that the PC keeps running despite this action. In that case, it may be necessary to disconnect the PC from its power source. For laptops, this may also mean waiting until the battery runs completely down (or disconnecting the battery, on PCs that permit such action).
For most PCs, a subsequent restart will return the device to normal operation — including a working graphics subsystem with no black screen. If the screen remains black despite all these efforts, additional troubleshooting is needed.
I will now briefly describe additional troubleshooting techniques that may or may not lead to a working system. The further you must proceed down this list of options, the more likely it is that a hardware failure of some kind is involved. For desktops, this may mean you need to replace an external graphics card (or the motherboard if a built-in CPU is in use). For laptops, it may mean replacing the motherboard or making a trip to a repair depot, assuming that the problem device is still covered under some kind of service or repair contract.
The troubleshooting sequence for persistent black screens
1. Try a different display. Perhaps the graphics circuitry is indeed working. (This is possible if the disk activity light runs for a while after restart, but the screen remains black.) Plugging in an alternate display may work, in which case troubleshooting has just identified the display rather than the GPU or graphics chipset, and associated drivers, as the culprit.
2. Boot into Safe Mode for various checks. This requires access to bootable Windows 10 recovery media. (I describe how to build such media in another Computerworld story: “Windows 10 recovery, revisited.”) If the PC will boot to recovery media and the display works, congratulations! You’ve just established that something is wrong with the normal boot image for Windows 10 on the affected PC.
You can try a boot repair utility (I like the “Fix Windows Boot Problems” tool on Macrium Reflect Free’s Rescue Media), or get some repair ideas from my 2016 step-by-step guide to repairing Windows 10. If the PC retains its black screen, it’s pretty conclusive that something is wrong with the GPU or built-in graphics circuitry. Proceed to Step 3.
3. Try different graphics circuitry. Though this troubleshooting technique can also serve as a repair, it depends on a USB 3 external GPU to see if the internal GPU or graphics circuitry isn’t working. If you can plug such a USB device into the affected PC, and then graphics work when a display is hooked up to the device, you’ve just demonstrated where the problem lies. That problem must now be addressed. Proceed to step 4.
Don’t have a USB 3 external GPU for testing/troubleshooting? See this Newegg search for some good potential candidates, many of which are available in the $50 to $75 range for HDMI, DisplayPort, and DVI displays.
4. Replace the graphics hardware. It’s up to you (and prevailing service contract arrangements) whether this is a DIY exercise or if it involves turning the PC over to a repair shop or a designated, official repair outlet for an OEM or maker. But some way, somehow the graphics hardware has to be changed out. For some laptops, especially older ones, this may mean outright device replacement, rather than repair, is the best option.
Nobody wants to see a black screen on Windows 10
If you (or one of your users) does encounter this particular phenomenon, you should now have a pretty good idea of how to address it. In most cases, reloading the graphics driver or restarting the PC will do the trick. In other cases, there’s no choice except to work through the standard troubleshooting sequence as outlined above.
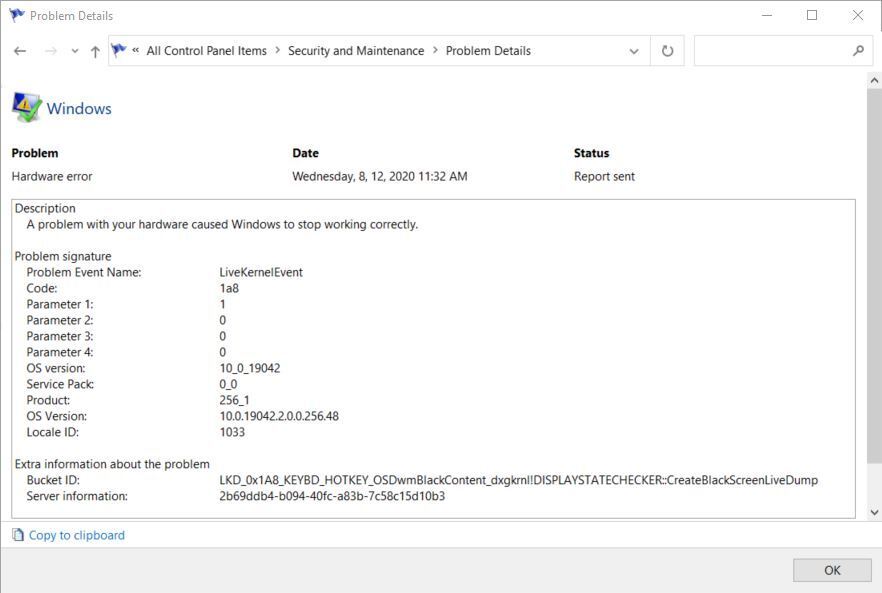
If you’re really, really lucky, a quick dive into the Windows 10 Reliability Monitor will reveal the same kind of error details shown in the figure below, which started appearing in Windows 10 with version 2004. Prior to that release, black-screen errors went mostly unacknowledged in Windows error reporting.
Ed Tittel/IDG
This article originally appeared on ComputerWorld.


